Getting started
From signing in to your first rendered piece in about two minutes.
Sign in
The studio lives at gemgpu.com/studio. Create an account with your email and a password, or continue with Google. New accounts verify their email with a typed code before the studio opens — check your inbox for it.
Your account is what makes GemGpu feel like one studio everywhere: scenes, materials, and templates you save go to your cloud Drive and follow you to any machine.
The start screen
Until a model is loaded, the viewport shows the start card:
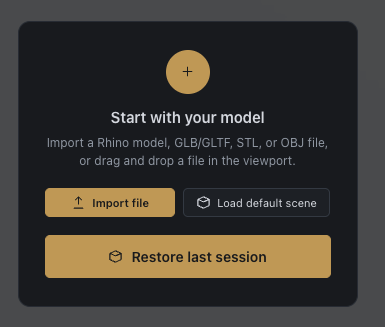
- Import file — pick a model from disk (
.glb,.gltf,.3dm,.stl,.obj). You can also just drag the file into the viewport. - Load default scene — the bundled solitaire ring with an authored studio look. The fastest way to explore before you bring your own work.
- Restore last session — appears when a previous session's autosave exists. GemGpu never restores automatically; picking up where you left off is always your choice.
First import
When your model arrives, GemGpu:
- Centers and normalizes it — every model is scaled to a consistent on-screen size, so files authored in millimetres, metres, or arbitrary units all arrive framed correctly.
- Classifies the parts — gems and metals are recognized and placed in the hierarchy under a group named after the file.
- Applies the studio look — importing as your first model brings the default environment, lighting, and material templates with it, so the piece never appears grey and unlit.
From here, click a part to select it — the inspector on the right shows its material, and the tool rail on the left switches between orbit, move, rotate, and scale.
The thirty-second tour
- Orbit with the left mouse button, zoom with the wheel, pan with the right button.
- Open the Material tab, click a gem, and try a few presets from the library on the left — the stone updates live.
- Open the Env tab and drag the environment rotation — watch the reflections sweep.
- Press the camera button in the top bar for an instant snapshot PNG.
- Open the Anim tab and click Turntable, then press play under the viewport.
That's the loop: import, look, light, shoot, animate. Each of those has a full chapter in these docs.
Saving
Scene settings save to your Drive from the Scene tab (or File menu) — name it and it lands in Drive & library. Your model's geometry stays on your device by default; if you want the model itself available on other machines, use Save model to Drive — an explicit, opt-in upload. GemGpu never uploads your model bytes on its own.
An autosave guards your session in the background. If the tab closes unexpectedly, the start screen will offer Restore last session next time.