Branding & engraving
Put your mark on the piece — engraved text inside a band, a carved monogram, a printed logo on a clasp. Branding layers project text or images onto any part's surface, flat or in real relief.
Open the Material tab and expand Branding.
Add a layer
- + Text — creates a text layer and waits for you to click the surface where it should land.
- + Image — pick a logo file (up to 4 MB; transparent PNG works best), then click the surface.
The click decides everything: which part, where, and facing which way. Text projects with a wide aspect; images keep their own proportions.
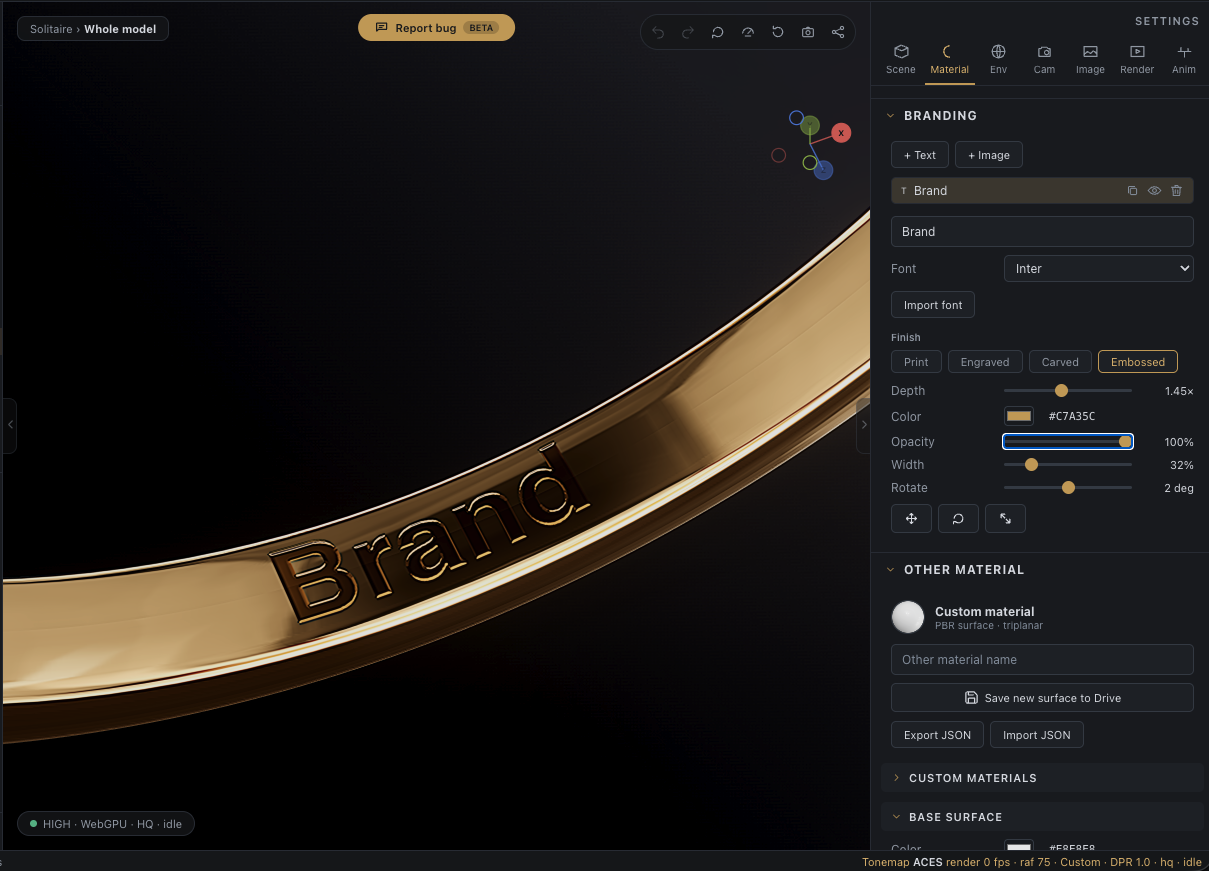
Place precisely
With a layer selected, three surface tools take over the viewport:
| Tool | Drag behaviour |
|---|---|
| Move on surface | Slides the mark across the model — it follows the curvature, and can cross onto another part. |
| Rotate on surface | Spins the mark around its surface direction. |
| Scale on surface | Resizes it (5–150% of the model's diameter). |
Placed layers ride along when you move the part, and follow the model's rotation during animation.
Content & style
- Text and font — free text with a set of classic faces (Inter, Helvetica, Times, Garamond, Script, and more), or Import font (.ttf/.otf/.woff/.woff2) for your house typeface.
- Finish — the material story:
- Print — a flat decal (a printed image keeps its own colors).
- Engraved / Carved — recessed into the metal; Carved is the broader, deeper cut. The grooves shade and catch the environment like real cuts.
- Embossed — raised relief.
- Depth (0.2–3×) — how deep or proud the relief sits (non-Print finishes).
- Color / Opacity / Width / Rotate — the mark's tint (relief on metal tints the metal itself), transparency, size, and spin.
For an image layer, its transparency defines the relief shape — a clean logo alpha becomes a clean carve.
Manage layers
The layer list holds any number of marks; select a row to edit it, and use Duplicate, Hide/Show, and Delete per layer. Branding saves with the scene and travels with your shared links.